
Here’s the thing: a lot of folks assume that if a hinge says "heavy duty," it’s good to go. But undersized hinges are actually the number one reason gates fail. When the hardware can’t handle the real load, all that weight transfers straight to the pins and mounting points. You end up with bending metal, worn-out parts, and eventually, a gate that’s practically falling off its posts.
On the flip side, going too big isn’t great either. Sure, oversized hinges can hold the weight, but they can look clunky, create unnecessary friction, and actually make it harder to fine-tune the swing. You want that "just right" fit—enough capacity to do the job without going overboard.
Before you can pick your hinges, you need real numbers. Eyeballing it usually leads to undersizing, so take a few minutes to calculate accurately.
Different materials carry weight differently. Here’s a rough guide to what you’re probably working with:
Tubular steel frame with mesh infill: Runs about 8-12 lbs per square foot.
Solid steel sheet construction: Heavier, around 15-20 lbs per square foot.
Wrought iron or ornamental steel: Generally in the 10-15 lbs per square foot range.
Hardwood (oak, mahogany, ipe): These dense woods come in at 12-18 lbs per square foot.
Softwood (cedar, pine, fir): Lighter, typically 6-10 lbs per square foot.
Aluminum frame: The lightweight option at 4-7 lbs per square foot.
Composite or vinyl: Similar to aluminum at 5-9 lbs per square foot.
To figure out your gate’s approximate weight, just follow these steps:
Calculate the square footage: Take the height (in feet) and multiply it by the width (in feet).
Multiply by material weight: Use the per-square-foot ranges above.
Add hardware weight: Don’t forget—latches, locks, and automation gear all add up.
Consider infill: A solid panel is going to weigh a lot more than spaced pickets or mesh.
Here’s an example: Let’s say you have a 6-foot tall by 8-foot wide solid steel gate. That’s 48 square feet. Multiply that by about 17 lbs (splitting the difference) and you’re looking at roughly 816 lbs total.
Manufacturers put maximum weight ratings on their hinges, but you have to know how to read between the lines.
Most hinge ratings you see refer to static load—basically, the weight of the gate just sitting there. But when that gate is moving, it’s under dynamic load. A heavy gate swinging open creates momentum that puts extra stress on the hinges. And if you live in a windy area, a solid gate acts like a sail, adding even more force.
Here’s a good rule of thumb that professionals follow: always pick hinges rated for at least 25-50% more than your gate’s calculated weight.
Think of it this way:
A 400 lb gate needs hinges rated for 500-600 lbs, minimum.
An 800 lb gate needs hinges rated for 1,000-1,200 lbs, minimum.
That buffer covers dynamic forces, wind loads, ice buildup in winter, and just general wear and tear over the years.
Weight capacity tells you if the hinges can do the job, but the physical size determines if they’ll actually fit right.
Back of post to face of gate: This tells you the hinge’s offset. If it’s too short, the gate will bind against the post. Too long, and it’ll look awkward and might stress the mounting points.
Hinge width and height: Wider hinges spread the weight across more mounting points, giving you better stability. Taller gates usually benefit from taller hinges to resist twisting.
Pipe or post diameter: If you’re using band and strap hinges, the band has to match your post diameter exactly. No wiggle room there.
Wider gates mean more leverage. A 12-foot wide gate puts way more stress on its hinges than a 6-foot wide gate, even if they weigh the same. If your gate is over 10 feet wide, you should seriously consider using three hinges instead of two to spread out that load.
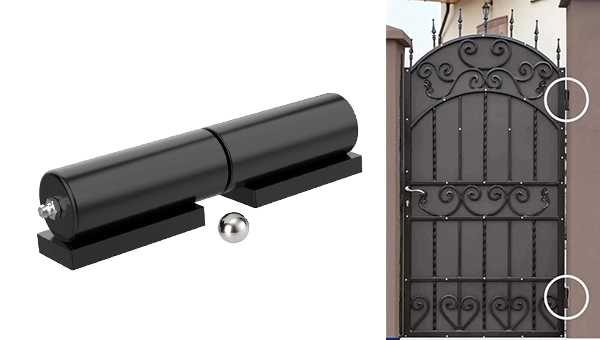
Not every heavy duty hinge works for every situation. You have to match the style to the job.
Best for: Pipe frame construction, farms, industrial sites.
These have a band that wraps around the post and a strap that attaches to the gate. They’re great for spreading out weight and handling heavy loads. Just make sure the band’s inside diameter matches your post’s outside diameter perfectly.
Best for: Steel frame gates, custom fab work, commercial jobs.
These weld directly onto the gate and post, giving you a permanent, rock-solid connection. They’re perfect for gates over 1,000 lbs, but you have to be precise with alignment during installation.
Best for: Situations where you might need to tweak things later, like with settling posts.
These let you adjust the gate vertically and horizontally even after it’s installed. That’s a lifesaver if your posts shift over time or if you couldn’t get everything perfectly aligned from the start.
Even the perfect hinges will fail if you put them in the wrong spot. Placement is key to spreading the load.
Top hinge: Put it about 4-6 inches from the top of the gate.
Bottom hinge: Position it 8-12 inches from the bottom.
Third hinge (if needed): Center it between the top and bottom.
Think about using three hinges if:
Your gate is over 7 feet tall.
It weighs more than 800 lbs.
It’s wider than 10 feet.
It has solid infill that catches the wind.
You’re planning to automate it.
If you’re adding an automatic opener, hinge selection gets even more critical.
Automatic openers put different kinds of stress on hinges. They push and pull, creating extra forces that go straight through the hinges.
Here’s what you need for automated gates:
Hinges have to stay perfectly aligned so the limit switches work right.
Any binding or friction will trigger fault codes on the opener.
Heavy duty hinges with bearings reduce strain on the motor.
Depending on your opener, you might want hinges with built-in stops.
This is non-negotiable: automated gates absolutely cannot sag. Even a quarter-inch of sag will mess with the opener mechanism. That’s why picking the right size with a generous safety margin is so important for automation projects.
Even experienced pros make these mistakes sometimes. Learn from them so you don’t have to.
Mistake 1: Rating hinges for the gate as it is now, ignoring future additions.
Fix: Calculate the weight with everything you might add later—decorative elements, automation arms, locks, signage.
Mistake 2: Thinking bigger is always better.
Fix: Match the hinge size to your actual setup. Oversized hinges can bind and make alignment a pain.
Mistake 3: Forgetting about the gate frame itself.
Fix: Make sure your gate frame is strong enough to transfer the weight to the hinges without twisting.
Mistake 4: Ignoring post strength.
Fix: Check that your posts can actually handle the load. Hinges rated for 1,000 lbs won’t save you if they’re bolted to undersized posts that just bend.
Choosing the right hinges is half the battle. Installing them right is the other half.
Steel posts need clean, flat surfaces. Grind off any paint, rust, or bumps before you weld or bolt. Wood posts need good blocking and corrosion-resistant fasteners that go deep into solid wood.
Here’s a pro tip: install all the hinges loosely, hang the gate, and check how it swings before you tighten everything down. Use temporary shims to get perfect alignment. If you’re welding, tack it first, check it, then lay down the full welds.
Even heavy duty hinges need some attention now and then. Make a habit of checking all fasteners once a year, lubricating moving parts, and looking for any signs of wear.
Before you pull the trigger on those hinges, run through this list:
Gate weight calculated with a safety margin.
Post material and size double-checked.
Back of post to gate face measurement recorded.
Gate width and height noted.
Automation planned or at least future-proofed.
Climate factors considered (wind, snow, ice).
Three hinges recommended for your dimensions.


